What this tool does
A drone survey gives you a folder of single photos. Each one shows a small patch of ground, and none of them shows the whole site. To measure, plan or share the site, you need one image that covers everything and sits in the right place on a map. That image is called a mosaic, or an orthomosaic image when it is fully corrected for terrain. Turning photos into that one map is what people mean by orthomosaic drone mapping.
This tool is free orthomosaic stitching software that runs in your browser. It finds the same ground points in overlapping photos, works out where every photo belongs, evens out brightness differences between them and blends the edges so you do not see a hard line where one photo ends. If your drone saved GPS data in the photos (almost all DJI, Autel and Parrot drones do), the result is placed in real-world coordinates and you can open it straight in QGIS, ArcGIS or Global Mapper.
Desktop drone orthomosaic software does this too, but it costs money, needs a strong computer and takes time to learn. Most other online drone orthomosaic software runs in the cloud and wants you to upload gigabytes of photos to its servers. For a small site and a quick result, I think a browser tool is the better fit: drop the photos, wait a minute, download the GeoTIFF. It is the fastest way I know to create your own aerial map from drone images.
How the tool turns drone photos into an orthomosaic
Everything below runs in a background thread (a Web Worker) on your own computer, so the page stays responsive while it works.
- Read the metadata. The tool reads the GPS position, the height above the take-off point, the camera heading and the lens data from each photo's EXIF and XMP tags. From the height and the lens it estimates the ground size of one pixel.
- Find features. Each photo is scaled to 1,600 pixels on its long side and searched for corners: small spots with strong contrast in two directions, like the edge of a roof or a rock. Each corner gets a 256-bit "fingerprint" that still matches when the photo is rotated.
- Match neighbours. Photos that are close to each other by GPS are compared. Fingerprints that match in both directions are kept, and a RANSAC test keeps only the matches that agree on one shift, rotation and scale between the two photos. Wrong matches on repeated patterns such as crop rows are thrown out here.
- Solve all positions together. All matches from all photo pairs go into one least-squares calculation that places every photo at once. Solving everything together spreads small errors evenly, so a long flight line does not slowly bend. The GPS positions pull the result gently into place in UTM coordinates.
- Balance the colors. Where two photos overlap, the tool compares their average brightness in red, green and blue and calculates a small gain for each photo, so a photo taken when a cloud passed does not show up as a dark patch.
- Blend the seams. For each output pixel the tool mostly uses the photo whose centre is closest. The centre of a drone photo looks most straight down and has the least lens distortion. Near the line where two photos meet, both are mixed over a short distance, which hides the seam without blurring the whole overlap.
- Write the GeoTIFF. The mosaic is drawn in strips of 256 rows and written straight into a tiled, Deflate-compressed GeoTIFF with a transparent background. Because only a few strips are in memory at a time, the output can be much larger than a normal browser canvas allows.
2D mosaic or true orthomosaic: what you get
I want to be clear about this, because many tools are vague about it. A true orthomosaic from software like Pix4D, Agisoft Metashape or OpenDroneMap first builds a 3D model of the ground from the photos. It then uses that model to correct every pixel for height, so a tall building or a hill sits exactly where it should on the map.
This tool skips the 3D model. It treats the ground as a flat surface and fits each photo onto it. On flat or gently sloping land (fields, parking lots, construction pads, beaches, flat roofs) the result looks the same as an orthomosaic and lines up with satellite imagery within a few pixels. On sites with tall objects, you will see some "lean": the sides of buildings and trees are visible, and a tall object can look slightly bent where two photos meet.
My take: for a quick site overview, a progress photo, a crop-health check or a map for a report, the 2D mosaic is all you need. If your orthomosaic drone mapping needs survey-grade accuracy, volume measurements or a height model, use photogrammetry software with ground control points.
Worked example: how sharp will the mosaic be?
The ground sample distance (GSD) is the size of one photo pixel on the ground. It decides how much detail the mosaic can show. The tool calculates it for you, but it helps to know how it works when you plan a flight.
GSD = flight height × sensor width ÷ (focal length × image width in pixels)
A DJI Phantom 4 Pro flying at 100 m above the take-off point:
| Flight height | 100 m |
| Sensor width | 13.2 mm |
| Focal length | 8.8 mm |
| Image width | 5,472 px |
GSD = 100 × 13.2 ÷ (8.8 × 5,472) = 0.0274 m, so about 2.7 cm per pixel.
One photo then covers about 150 × 100 m. With 20 photos at 75% overlap (four flight lines of five photos), expect a mosaic of roughly 260 × 200 m. Choosing "Half" resolution in the tool doubles the pixel size to about 5.5 cm, which is still sharp enough to see cars and paths and makes the file four times smaller.
How to fly for a clean stitch
Most failed stitches come from the flight, not from the software. For a clean orthomosaic drone image, use these settings when you fly.
- Point the camera straight down. Set the gimbal to -90°. Tilted photos show the ground at an angle and do not fit onto a flat mosaic. The tool warns you when DJI photos were not taken straight down.
- Use 70 to 80% overlap. Neighbouring photos should share most of their area, both along a flight line and between lines. Mapping apps such as DJI Pilot, Pix4Dcapture or DroneDeploy set this for you.
- Fly at one height. Keep the same altitude for the whole flight. Photos at very different heights have different scales and match poorly.
- Lock the exposure. Automatic exposure changes brightness from photo to photo. The tool balances colors, but a fixed exposure and white balance give a more even result.
- Avoid water and plain surfaces. Lakes, fresh snow and freshly ploughed fields have few features to match. Include some edges, roads or vegetation in every photo if you can.
- Fly around midday on a calm day. Short shadows change less between photos, and wind does not move trees and crops between shots.
How to make an orthomosaic map from drone images
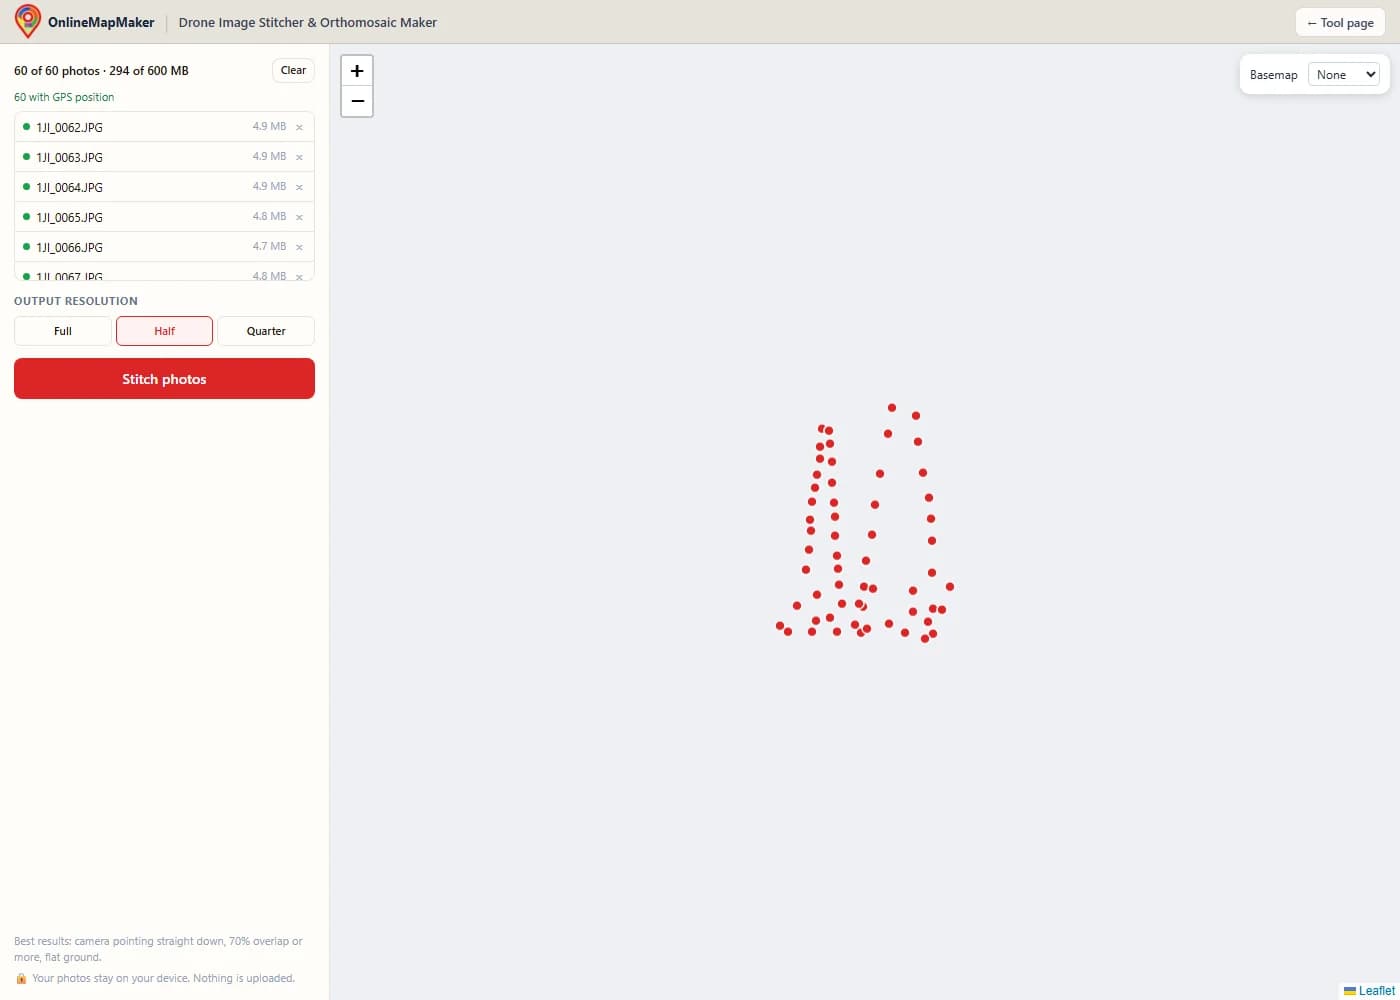
Click the upload area or drag your drone photos onto the tool. You can add up to 60 JPG, PNG or WebP photos with a total size of 600 MB. Photos with GPS show a green dot and appear as points on the map.
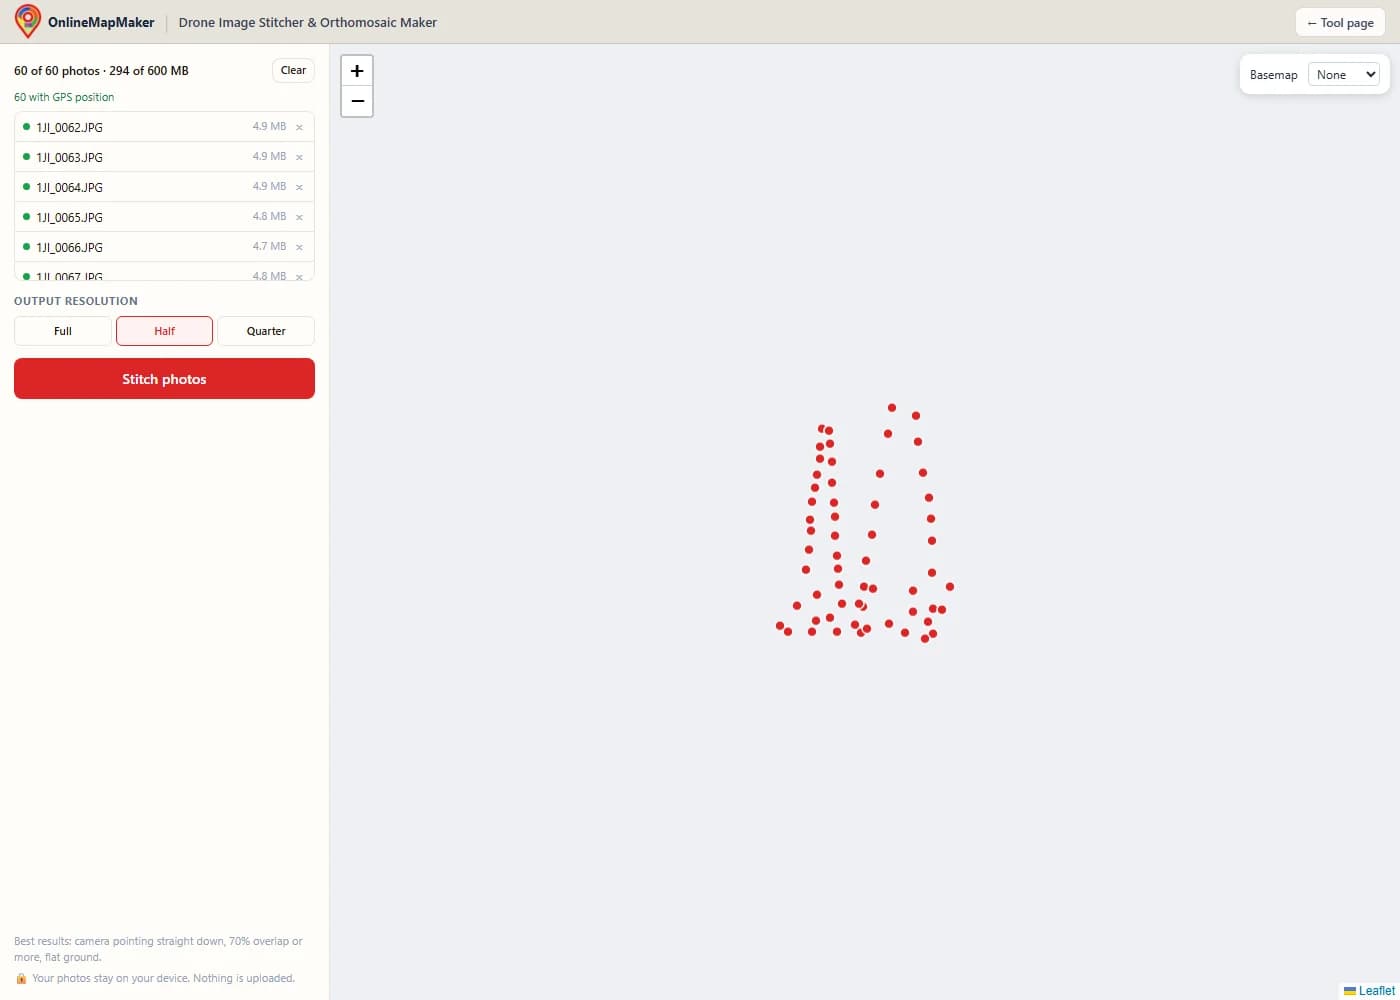
Choose the output resolution. "Full" keeps every pixel of your photos, "Half" and "Quarter" make the mosaic faster to build and the file smaller. Then click "Stitch photos".
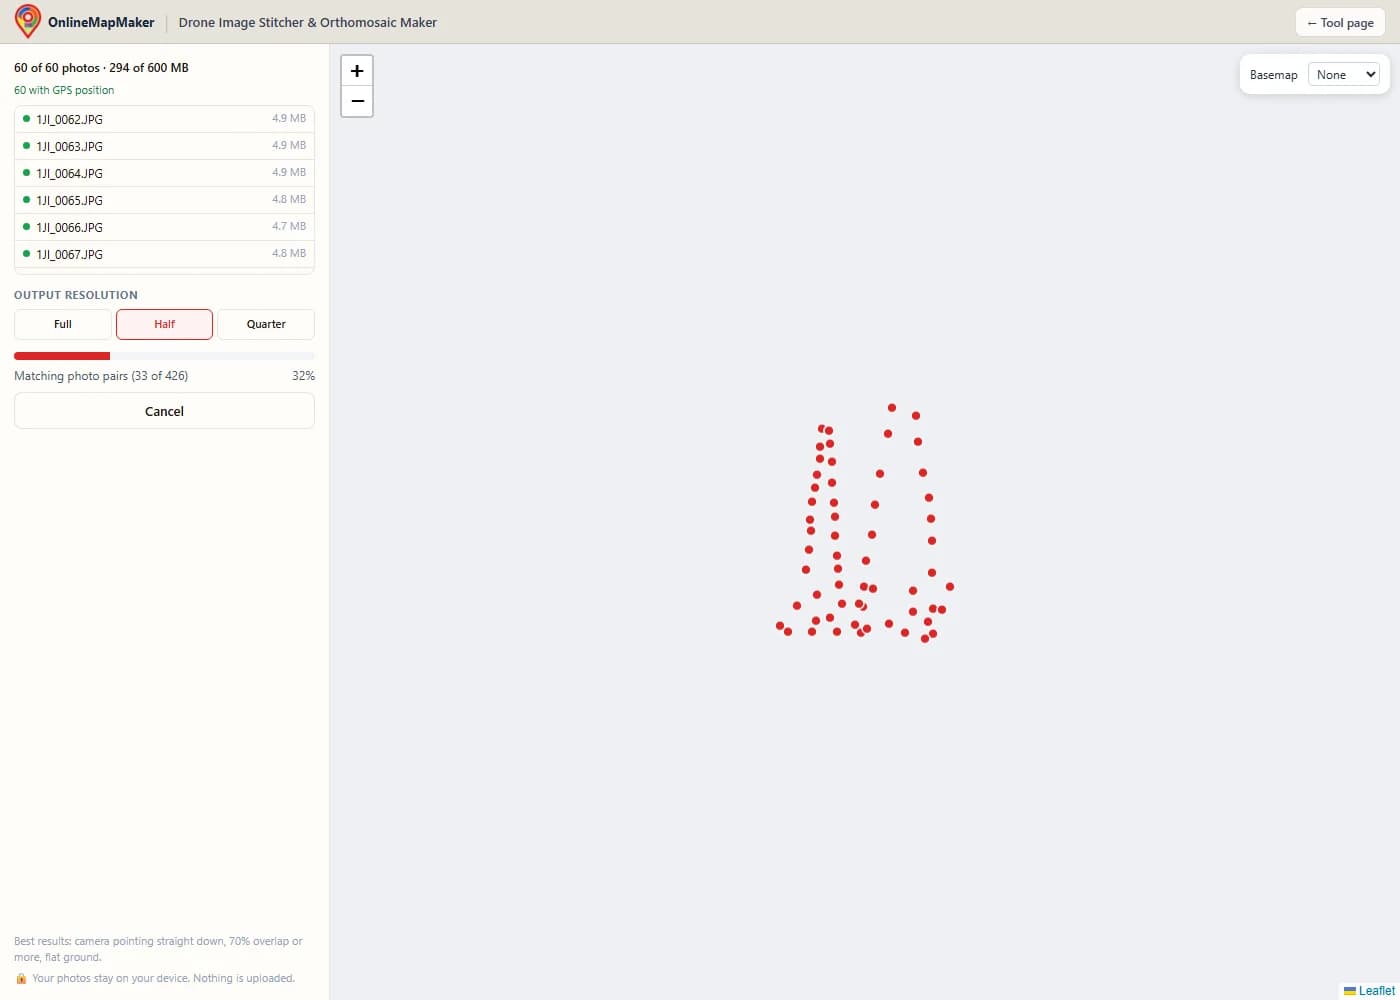
Watch the progress bar while the tool finds features, matches photo pairs, aligns everything, balances colors and draws the mosaic. On a recent laptop, sixty 12-megapixel photos take about one and a half minutes at Half resolution and about two and a half minutes at Full.
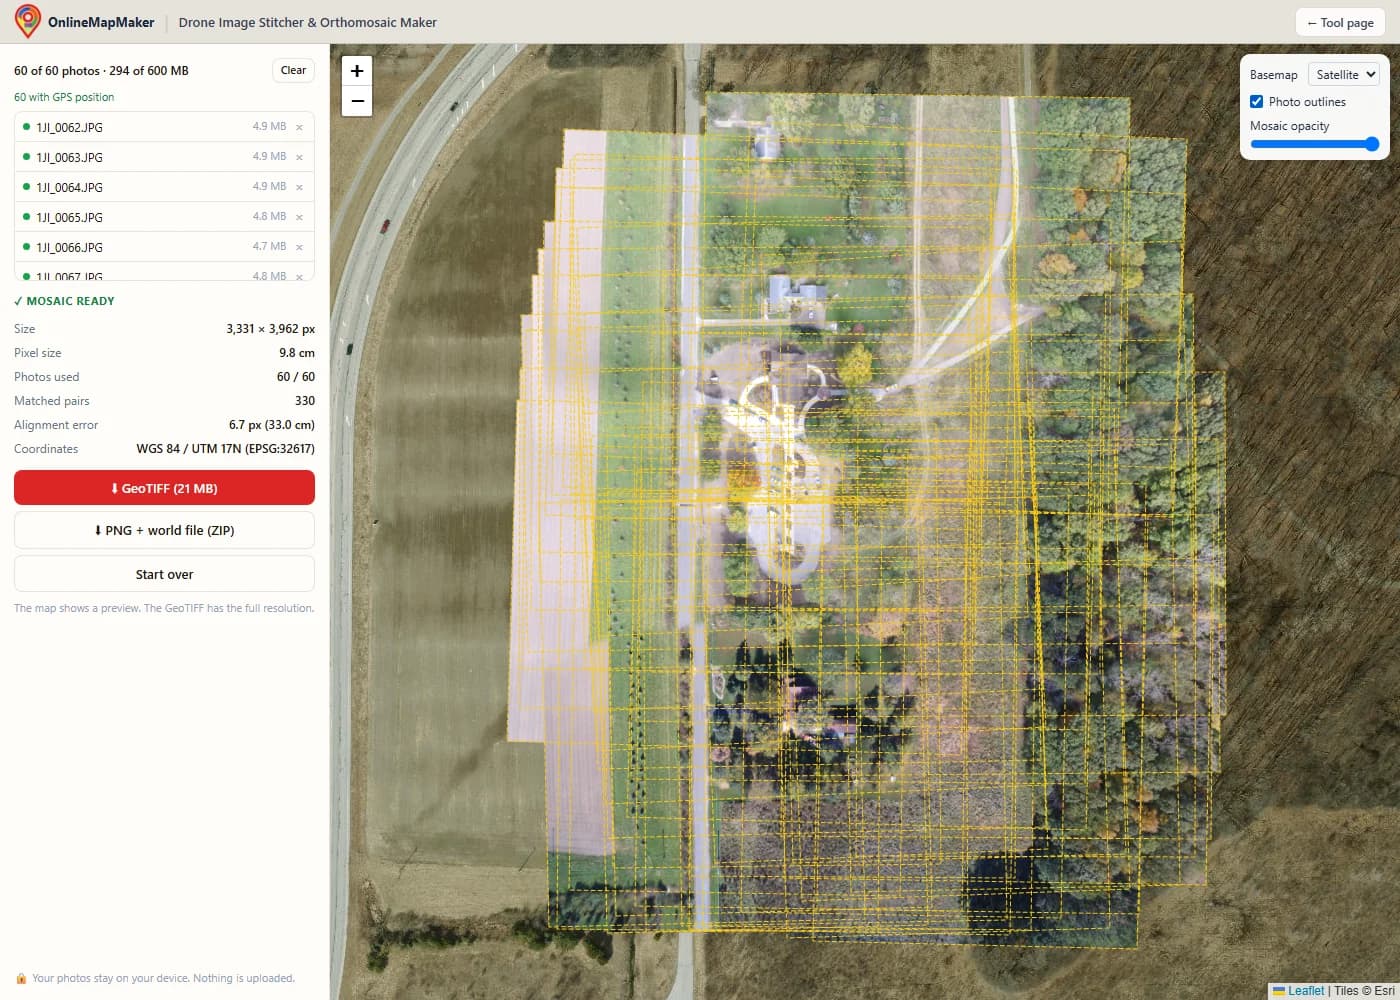
Check the result on the map. Turn on the satellite basemap to compare positions, show the photo outlines, or lower the mosaic opacity. The panel shows the pixel size, the photos used and the alignment error.
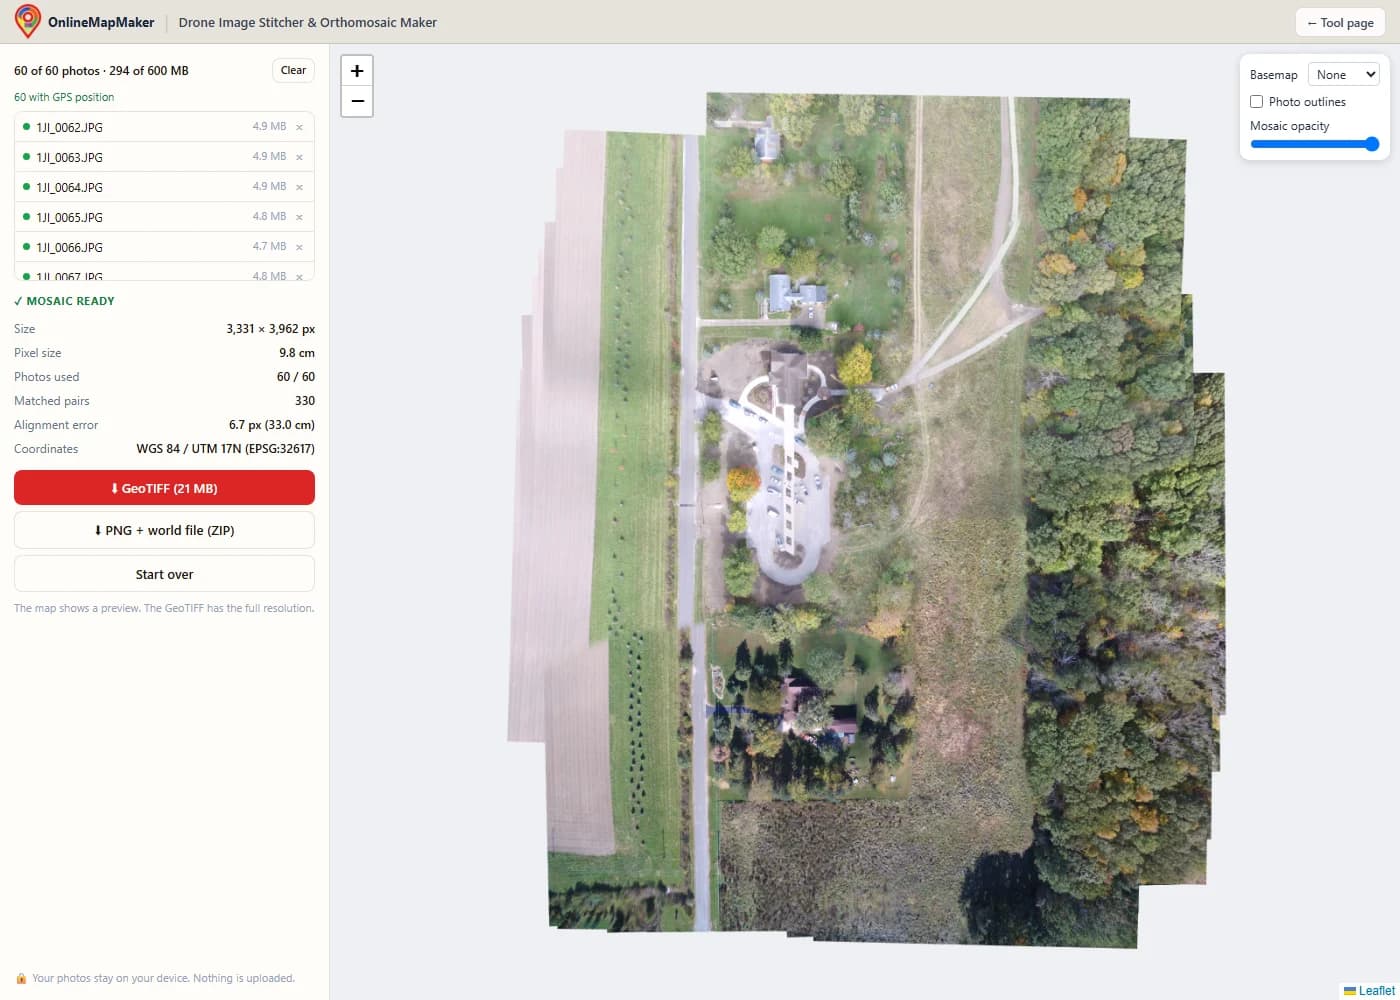
Download the GeoTIFF for GIS software, or a PNG with a world file (.pgw) and projection file (.prj) in a ZIP for tools that do not read GeoTIFF.
Real-world use cases
Where quick orthomosaic drone mapping in the browser saves time compared with full photogrammetry software.
- Construction progress photos. Fly the same small site every week and stitch a top-down image for the site report, without sending photos to a cloud service.
- Farm and field checks. Stitch a field after a storm or during the season to spot flooded areas, missing rows or crop stress, and load the GeoTIFF into QGIS next to your field boundaries.
- Roof and solar inspections. Combine photos of a large flat roof into one image to plan solar panel layouts or mark damage for a repair quote.
- Real estate and land listings. Show buyers the whole property in one clear image with the boundary lines drawn on top, instead of a single tilted aerial photo.
- Events and emergency response. Make a current map of a festival area, a flood zone or a search area in minutes, on a laptop in the field, without waiting for uploads on a slow mobile connection.
- Teaching drone mapping. Show students how overlap, flight height and camera angle change a mosaic, with instant results and no software installation.
Frequently asked questions
What is an orthomosaic image?
An orthomosaic image is one large aerial map made from many overlapping drone photos. The photos are aligned, corrected and blended so the result looks like a single picture taken straight down, with a real scale and real coordinates. You can measure on it and place it on a map next to other GIS data.
Can I create my own aerial map from drone images for free?
Yes. This tool is free orthomosaic stitching software with no account, no watermark and no upload. Fly your site with overlapping photos, drop up to 60 of them here and download the result as a GeoTIFF or PNG. For bigger flights, free desktop programs such as OpenDroneMap (WebODM) can also build a full orthomosaic, but they need installing and a strong computer.
Is my data uploaded anywhere?
No. The photos are read, matched and stitched by JavaScript running on your own computer. Nothing is sent to a server. You can disconnect from the internet after the page has loaded and the tool still works (only the optional basemap needs a connection).
Why are there limits of 60 photos and 600 MB?
A browser tab has much less memory than a desktop program. The tool keeps memory low: it finds features on small copies of the photos, then draws the mosaic in strips and loads only the photos each strip needs. In my tests, 60 photos (about 300 MB) used about 800 MB of browser memory, which works on most laptops with 8 GB of RAM. For larger flights, split the area into parts or use desktop software.
Is the result a real orthomosaic?
It is a georeferenced 2D mosaic. It assumes flat ground and does not build a 3D model, so it does not correct for building or terrain height. On flat land it looks the same as an orthomosaic. On hilly sites or near tall buildings, expect some distortion at the seams.
Which drones and cameras work?
Any camera that saves JPG, PNG or WebP photos. GPS from EXIF is read for all brands. DJI photos also give the flight height and gimbal angle from XMP, which makes the placement more accurate. RAW formats (DNG) and multispectral TIFF bands are not supported.
What if my photos have no GPS?
The tool still stitches them by matching features, but the result has no real-world coordinates. You then get a plain image (TIFF or PNG) instead of a GeoTIFF, and you can georeference it later in QGIS with the Georeferencer tool.
How accurate is the position of the mosaic?
The position comes from the drone's own GPS, which is usually accurate to 1 to 3 metres. The photos are aligned to each other much more precisely (the alignment error is shown in pixels). For centimetre accuracy you need an RTK drone or ground control points in survey software.
Why were some photos left out?
A photo is left out when it has too few matching features with its neighbours, for example over water or uniform crops, or when it overlaps too little. Without GPS, only the largest group of connected photos can be used. The tool lists the photos it could not place.
Which coordinate system does the GeoTIFF use?
WGS 84 with the UTM zone of your site, for example EPSG:32633 for UTM zone 33N. The EPSG code is stored inside the file, so QGIS, ArcGIS and GDAL recognise it automatically. The background outside the photos is transparent.
How long does stitching take?
It depends on your computer and the resolution. In my tests on a recent laptop, 60 photos of 12 megapixels took about one and a half minutes at Half resolution and about two and a half minutes at Full resolution. An older or low-power computer can take two to three times longer. Most of the time goes into finding features and drawing the final mosaic.
Can I use the mosaic for measurements?
Yes, for rough measurements. The pixel size is shown after stitching, and in a GIS you can measure distances and areas on the GeoTIFF. Expect errors of a few percent, because the ground is assumed to be flat and the scale comes from GPS.
The mosaic is calculated entirely in your browser with custom feature matching, least-squares alignment and gain compensation code. Photos are never uploaded. Results are for visual and planning use, not for survey-grade measurement. Optional base maps © OpenStreetMap contributors, drawn with Protomaps (hosted by KONAKTIVE), with CARTO as the fallback. Satellite imagery: Esri. Your files are read in your browser and are never uploaded to a server.